Getting started with CodesGuard
This guide takes you from a brand-new account to a working security workspace: sign up, secure your login, understand how the platform is organized, and read your security posture on the dashboard.
Create your account
CodesGuard is sold and provisioned through our team, so access starts with an
invitation to a workspace rather than an open sign-up form. Once your
workspace is set up, you and your teammates each receive an invitation by email. Open the
invitation link at app.codesguard.io and complete a short, three-step
registration that verifies your email before you set a password:
-
Enter your work email
CodesGuard sends a six-digit verification code to that address.
-
Verify the code
Type the six-digit code from your inbox to confirm you own the email.
-
Set your name and password
Choose a full name and a password (at least 8 characters). You're signed in automatically once this completes.
Sign in
On the sign-in screen, enter your work email and password. If you've enabled two-factor authentication, CodesGuard then asks for the six-digit code from your authenticator app (or one of your backup codes).
Workspaces & organizations
Everything in CodesGuard lives inside a workspace (also called an organization). A workspace owns your projects, engagements, scans, findings, members and subscription. Your active workspace is shown at the bottom-left of the sidebar — click it to switch between workspaces you belong to.
If you don't have an active workspace yet, the app prompts you to create one before you can start scanning. Managing members, roles and invitations is covered in Organizations.
The dashboard: your security posture
After signing in you land on the Dashboard — the command center that rolls up every module into a single view of your security posture. Nothing here is mock data; it aggregates real results from your SAST projects, SCA advisories, and DAST / AI Pentest runs.
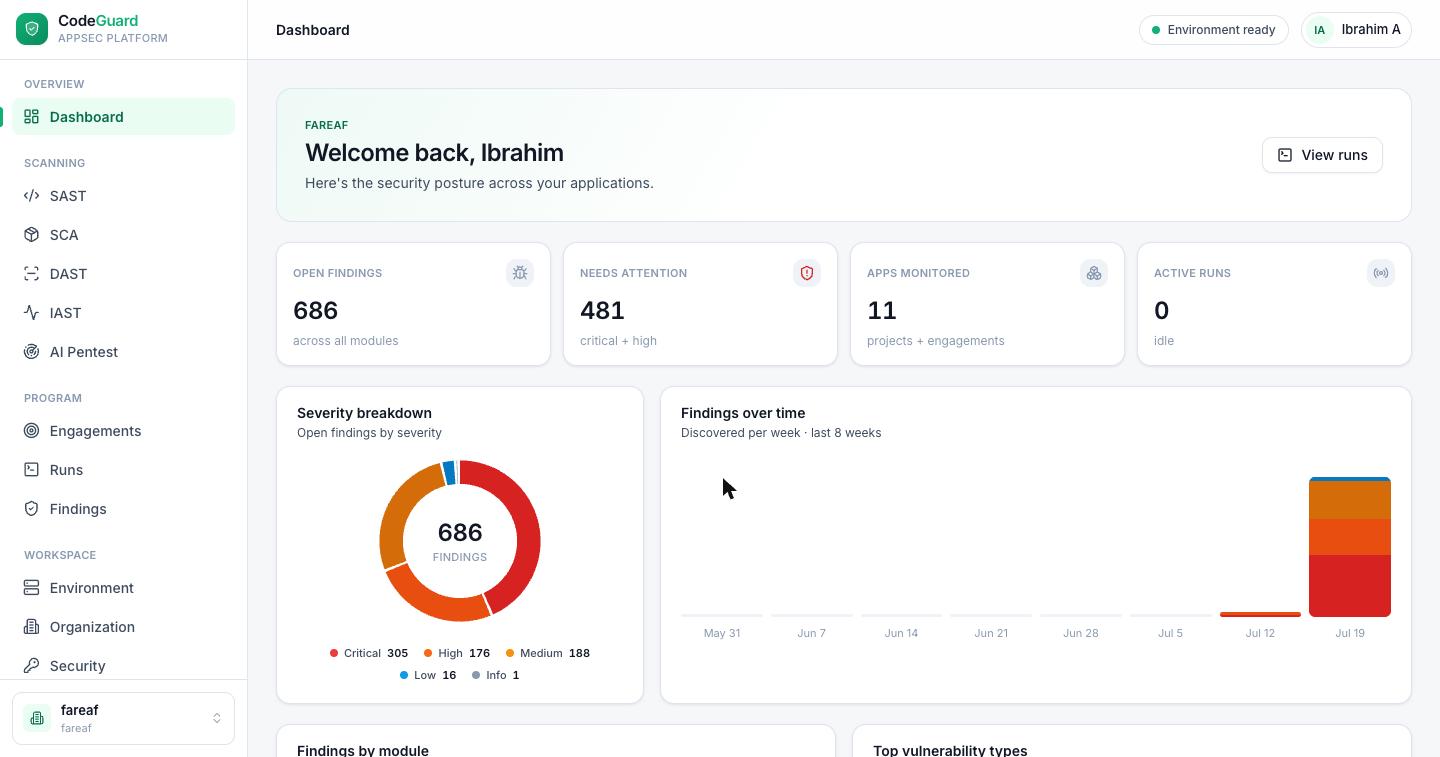
The four KPI tiles across the top give you an at-a-glance read:
Below the KPIs, the dashboard breaks the same data down several ways so you can see where risk concentrates:
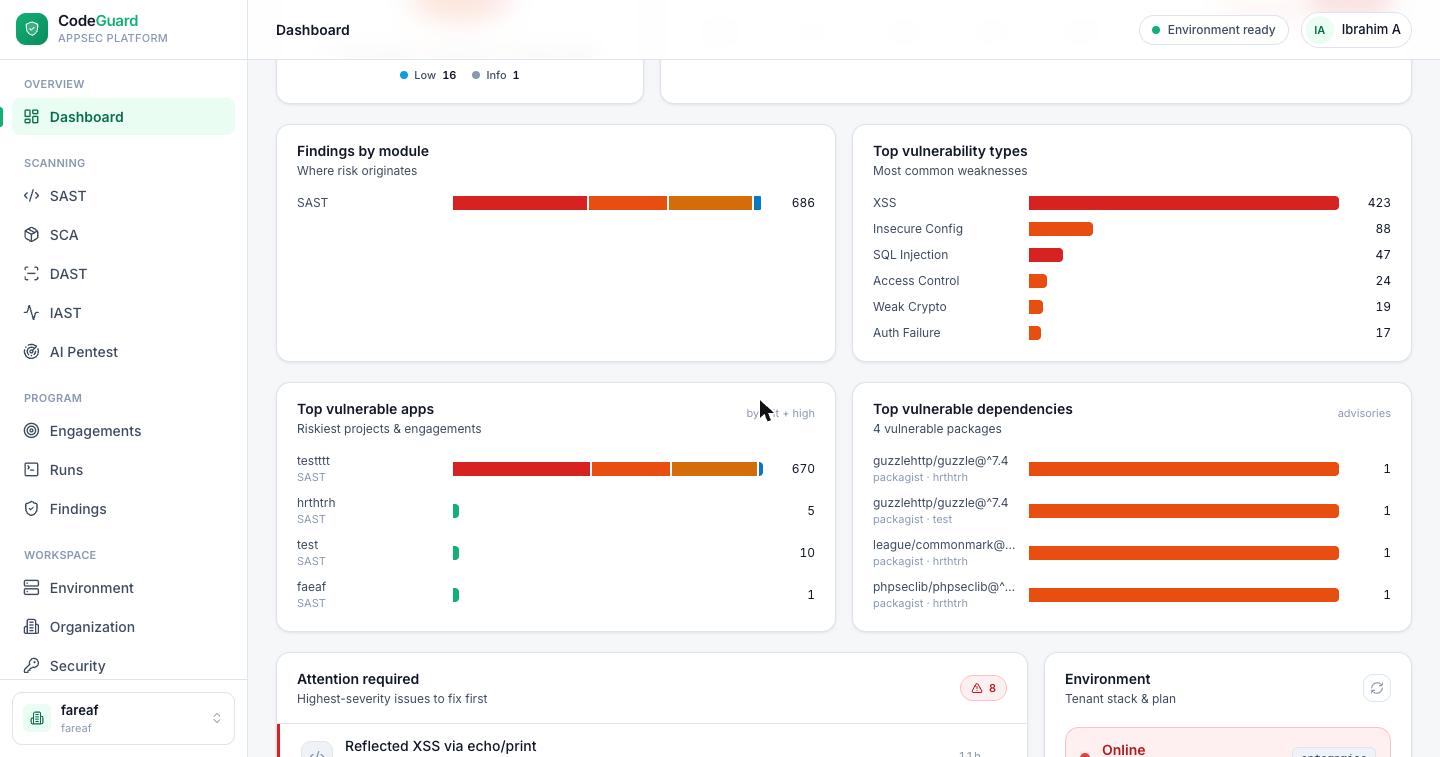
- Severity breakdown — open findings split into critical / high / medium / low / info.
- Findings over time — new findings discovered per week over the last 8 weeks.
- Findings by module — where risk originates (SAST, SCA, DAST, IAST, AI Pentest).
- Top vulnerability types — your most common weaknesses (XSS, SQL injection, insecure config, …).
- Top vulnerable apps and Top vulnerable dependencies — the projects, engagements and packages carrying the most risk.
- Attention required — the highest-severity issues to fix first, each linking straight to the finding.
- Environment — the health of your tenant scanning stack and your current plan. See Environment.
Finding your way around
The left sidebar is grouped to match how you work:
| Group | What's inside |
|---|---|
| Overview | The Dashboard — cross-module security posture. |
| Scanning | SAST, SCA, DAST, IAST, AI Pentest — the testing modules. |
| Program | Engagements & Runs (the target model behind DAST / AI Pentest) and unified Findings. |
| Workspace | Environment, Organization, Security and Billing. |
Next: run your first scan
The fastest way to see value is a SAST scan — upload a source archive and get vulnerability findings with dataflow evidence in minutes. Head to the SAST guide to walk it end to end.